32 内核编译
编译内核的动机可以归纳为几大类:
- 新功能的需求
- 原本内核太过臃肿
- 与硬件搭配的稳定性
- 其他需求 (如嵌入式系统)
1. 下载内核源码⚓
内核下载网址:https://mirror.bjtu.edu.cn/kernel/linux/kernel/v3.x/
[root@linux ~]# cd /usr/src/kernels/
[root@linux kernels]# wget https://mirror.bjtu.edu.cn/kernel/linux/kernel/v3.x/linux-3.18.140.tar.xz
[root@linux kernels]# tar -Jxf linux-3.18.140
[root@linux kernels]# cd linux-3.18.140
或到centos的网站下载 kernel 的SRPM包,然后从里面获取:
[root@dev src]# wget http://vault.centos.org/7.7.1908/os/Source/SPackages/kernel-3.10.0-1062.el7.src.rpm
[root@dev src]# rpm -ivh kernel-3.10.0-1062.el7.src.rpm
[root@dev src]# cd ~/rpmbuild/SOURCES/
[root@dev SOURCES]# ll linux-3.10.0-1062.el7.tar.xz -h
-rw-rw-r--. 1 root root 89M Aug  7 21:40 linux-3.10.0-1062.el7.tar.xz
[root@dev SOURCES]# tar -Jxf linux-3.10.0-1062.el7.tar.xz -C /usr/local/src/
[root@dev SOURCES]# cd /usr/local/src/linux-3.10.0-1062.el7/
2. 内核编译前的处理与内核功能选择⚓
2.1 编译前的工作⚓
- 查看主机硬件环境
- 清理源码残留的文件。主要用于删除前一次编译过程的残留数据。
# 删除编译过程产生的目标文件以及配置文件
[root@dev linux-3.18.140]# make mrproper
注意:内核功能选择文件也会被删除掉!
2.2 选择内核功能⚓
[root@linux linux-3.18.140]# make mrproper
# /boot/config-xxx 文件就是 .config 文件
[root@linux linux-3.18.140]# cp /boot/config-3.10.0-862.el7.x86_64 .config
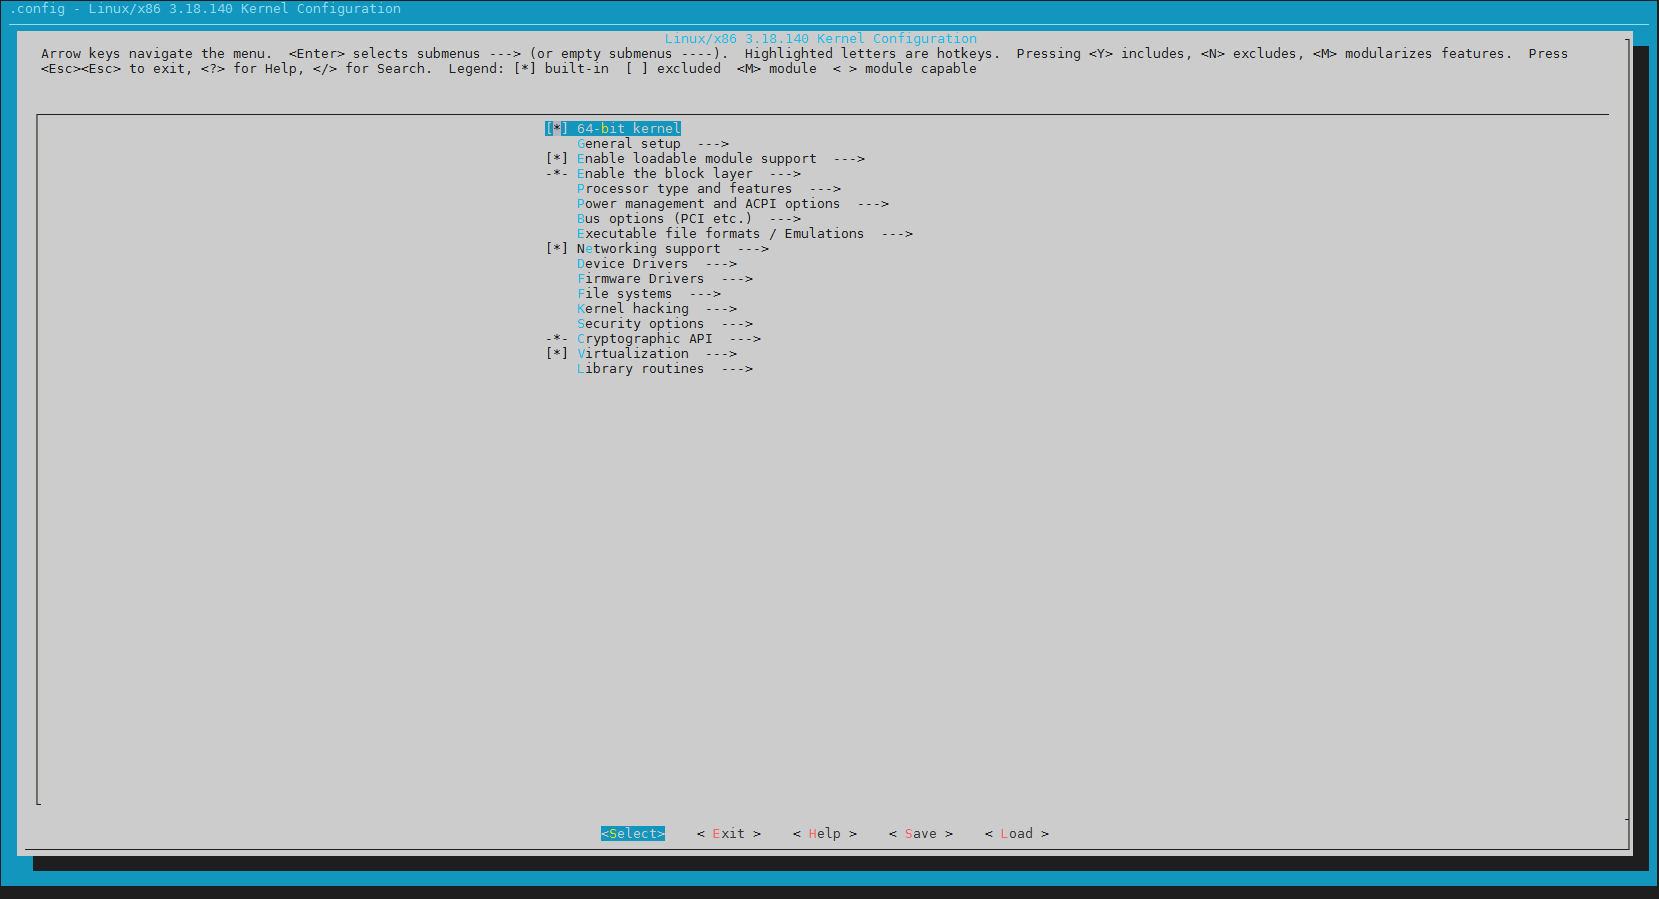
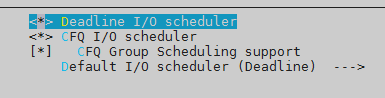
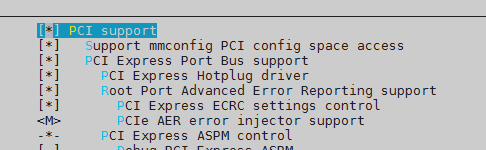
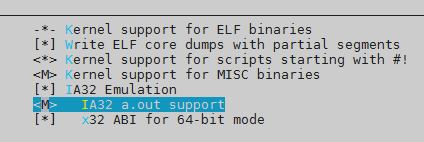
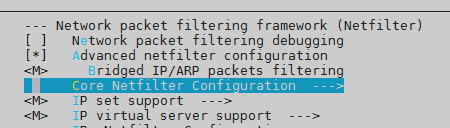
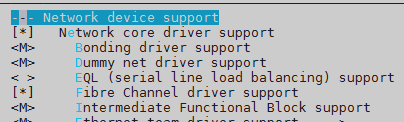
[root@linux linux-3.18.140]# make menuconfig
General setup

loadable module + block layer
CPU 的类型与功能选择


电源管理功能
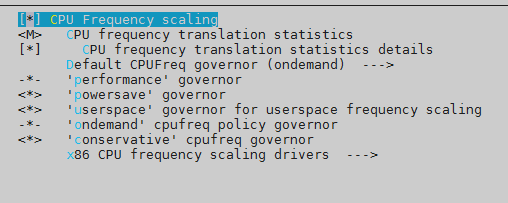
一些总线 (bus) 的选项
编译后执行文件的格式
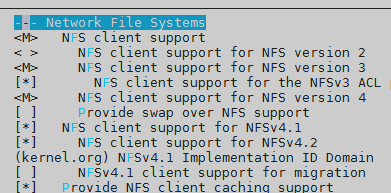
内核的网络功能
各种设备的驱动程序

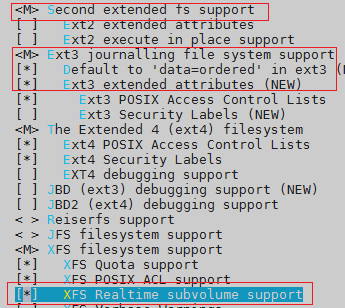
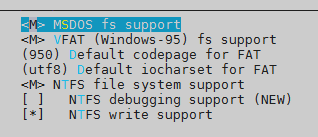
文件系统支持

安全选项
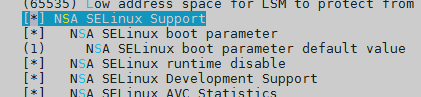
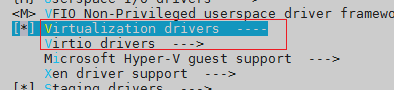
虚拟化

save之后exit即可。
3. 内核的编译与安装⚓
3.1 编译内核与模块⚓
make vmlinux    # 未经压缩的内核
make modules    # 仅内核模块
make bzImage    # 经压缩过的内核(预设)
make all        # 进行上述的三个动作
更多的选项通过make help来查看吧。
执行:
[root@linux linux-3.18.140]# make -j 1 clean    # 清除临时文件
[root@linux linux-3.18.140]# make -j 1 bzImage  # 编译压缩的内核
……
CRC 1d0071b2
Kernel: arch/x86/boot/bzImage is ready  (#2)
[root@linux linux-3.18.140]# make -j 1 modules  # 再编译模块
或者一步到位:
[root@linux linux-3.18.140]# make -j 1 clean bzImage modules
在上面的编译过程当中,如果有发生任何错误的话, 很可能是由于内核项目的选择问题,可能你需要重新以 make menuconfig 再次检查一下你的相关设定。如果还是无法成功的话,那么或许将原本的内核数据内的 .config 文件,复制到你的内核原始文件目录下, 然后加以修改,应该就可以顺利的编译出你的内核了。
3.2 安装内核模块⚓
内核模块是放置在 /lib/modules/$(uname -r) 下面的,但是同一个版本的模块被反复编译后来安装时,就会产生冲突,解决办法有两个:
- 先重命名旧的模块目录,然后才安装模块到目标目录去;
- 在
make menuconfig时,把那个General setup内的Local version修改成新的名称。
鸟哥建议使用第二个方式。
[root@linux linux-3.18.140]# make modules_install
[root@linux linux-3.18.140]# ll /lib/modules/
total 8
drwxr-xr-x. 7 root root 4096 Jul 31 14:27 3.10.0-862.el7.x86_64
# 这个就是新编译的模块的安装目录
drwxr-xr-x. 3 root root 4096 Dec 30 10:26 3.18.140
3.3 安装内核与制作选单⚓
3.3.1 复制内核文件⚓
编译完成的内核位于 /usr/src/kernels/linux-3.18.140/arch/x86/boot/bzImage,但在前文中提过系统内核理应位于 /boot 下面,且以 vmlinuz 开头的文件名。
[root@linux linux-3.18.140]# file arch/x86/boot/bzImage
arch/x86/boot/bzImage: Linux kernel x86 boot executable bzImage, version 3.18.140 (root@linux.study) #2 SMP Mon Dec 30 09:53:07 CST 2019, RO-rootFS, swap_dev 0x5, Normal VGA
# 内核文件
[root@linux linux-3.18.140]# cp arch/x86/boot/bzImage /boot/vmlinuz-3.18.140
[root@linux linux-3.18.140]# chmod +x /boot/vmlinuz-3.18.140
[root@linux linux-3.18.140]# cp .config /boot/config-3.18.140
[root@linux linux-3.18.140]# gzip -c Module.symvers > /boot/symvers-3.18.140.gz
# 设置一下 SELinux
[root@linux linux-3.18.140]# restorecon -Rv /boot/
restorecon reset /boot/System.map-3.18.140 context unconfined_u:object_r:boot_t:s0->unconfined_u:object_r:system_map_t:s0
3.3.2 创建 Initial Ram Disk⚓
关于何时需要创建该文件参考:新建 initramfs 文件
[root@linux linux-3.18.140]# dracut -v /boot/initramfs-3.18.140.img 3.18.140
3.3.3 制作开机选单⚓
[root@linux linux-3.18.140]# grub2-mkconfig -o /boot/grub2/grub.cfg
Generating grub configuration file ...
Found linux image: /boot/vmlinuz-3.18.140
Found initrd image: /boot/initramfs-3.18.140.img
Found linux image: /boot/vmlinuz-3.10.0-862.el7.x86_64
Found initrd image: /boot/initramfs-3.10.0-862.el7.x86_64.img
Found linux image: /boot/vmlinuz-0-rescue-57e79e9165254f54ac88ab28cdd9c64f
Found initrd image: /boot/initramfs-0-rescue-57e79e9165254f54ac88ab28cdd9c64f.img
done
预设较新版本的内核会放在最前面成为默认的开机选单项目。
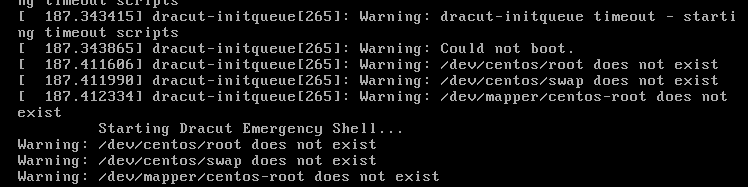
上述步骤全部成功之后就可以重启选择新内核开机啦!
但是我编译的内核并没有顺利的开机~是因为 device-mapper driver 模块加载出错(modprobe: ERROR: could not insert 'dm_mod': Exec format error),导致无法识别分区:
4. 单独编译内核模块⚓
大致流程:
- 下载 kernel 的源码,置于
/usr/src/kernels/下面。因为厂商的驱动都是根据 kernel 来开发的,所以会用到对应 kernel 的头文件之类的东西,这些文件是源码所提供的,所以需要安装 kenel 源码。也可以安装kernel-devel包来直接安装内核源码。在编译时指定的内核版本必须有它的源码存在。内核以/lib/modules/$(uname -r)/{build,source}两个链接文件指向的就是源码所在处。
[root@linux ~]# ll /lib/modules/3.18.140/
total 2768
lrwxrwxrwx.  1 root root     31 Dec 30 10:12 build -> /usr/src/kernels/linux-3.18.140
drwxr-xr-x. 11 root root    116 Dec 30 10:25 kernel
……
-rw-r--r--.  1 root root 305836 Dec 30 10:26 modules.symbols
-rw-r--r--.  1 root root 380795 Dec 30 10:26 modules.symbols.bin
lrwxrwxrwx.  1 root root     31 Dec 30 10:12 source -> /usr/src/kernels/linux-3.18.140
- 获取驱动源码,编译驱动模块。获取到源码之后,一定要参考
README文件,然后对源码进行编译,最后放到正确的目录下。 - 生成模块依赖文件并加载。
# 模块依赖文件
depmod -a
# 若是对当前正在使用的 kernel 编译的驱动,那么可以尝试加载
modprobe rr640l
# 想要开机时就加载此模块
dracut --force -v --add-drivers rr640l /boot/initramfs-3.18.140.img 3.18.140
# 查看是否已经在 initramfs 中
lsinitrd /boot/initramfs-3.18.140 | grep rr640
4.1 举例⚓
4.1.1 获取内核源码⚓
[root@dev tmp]# uname -a
Linux dev 3.10.0-1062.el7.x86_64 #1 SMP Wed Aug 7 18:08:02 UTC 2019 x86_64 x86_64 x86_64 GNU/Linux
# 与当前运行的内核版本一致
[root@dev tmp]# yum install kernel-devel-3.10.0-1062.el7.x86_64
# 源码已经安装了
[root@dev tmp]# ls -d /usr/src/kernels/3.10.0-1062.el7.x86_64/
/usr/src/kernels/3.10.0-1062.el7.x86_64/
4.1.2 获取驱动源码并编译⚓
鸟哥的例子中所用的驱动在当前不能使用,我又找了一个英特尔的驱动:https://downloadcenter.intel.com/zh-cn/download/27981/-Linux-
[root@dev tmp]# unzip Intel_MR_Linux_drv_7.5-07.705.04.00_pv.zip
[root@dev tmp]# cd Intel_MR_Linux_drv_7.5-07.705.04.00_pv/
[root@dev Intel_MR_Linux_drv_7.5-07.705.04.00_pv]# ll
total 28888
-rw-r--r--. 1 root root    10132 Oct 31  2017 Installation_Readme.txt
-rw-r--r--. 1 root root    11384 May 23  2017 License_v2.pdf
-r--r--r--. 1 root root 29525408 Mar  1  2018 megaraid_sas_components.tgz
-rw-r--r--. 1 root root    18073 Jun 19  2018 MR_Linux_drv_v07.705.04.00_readme.txt
-r--r--r--. 1 root root     4936 Mar  1  2018 OS_Support_list_mr7.5.txt
在查看了 Installation_Readme.txt 文件之后,了解到后续步骤是:
1) Untar driver source tarball-
#tar -zxvf megaraid_sas-<driver_version>-src.tar.gz

2) Go to driver source directory-
#cd megaraid_sas-<driver_version>/

3) To compile the driver for distro use the helper script
"compile.sh" bundled inside source code-
#./compile.sh
[root@dev Intel_MR_Linux_drv_7.5-07.705.04.00_pv]# mkdir megaraid_sas
[root@dev Intel_MR_Linux_drv_7.5-07.705.04.00_pv]# tar -zxf megaraid_sas_components.tgz -C megaraid_sas
[root@dev Intel_MR_Linux_drv_7.5-07.705.04.00_pv]# cd megaraid_sas/
# 下面是一些已经做成各种版本和形式的文件,还有源码的压缩包
[root@dev megaraid_sas]# ll
total 144
drwxrwxr-x. 3 500 nginx     20 Mar  1  2018 citrix7
drwxrwxr-x. 2 500 nginx    128 Mar  1  2018 dkms-rpms-1
drwxr-xr-x. 2 500 nginx     49 Mar  1  2018 generic_srpm
drwxr-xr-x. 2 500 nginx     49 Mar  1  2018 kmod_srpm
drwxr-xr-x. 2 500 nginx     53 Mar  1  2018 kmp_srpm
-rwxrw-r--. 1 500 nginx 143926 Mar  1  2018 megaraid_sas-07.705.04.00-src.tar.gz
drwxrwxr-x. 3 500 nginx     20 Mar  1  2018 oel6_uek
drwxrwxr-x. 3 500 nginx     20 Mar  1  2018 oel7_uek
drwxrwxr-x. 4 500 nginx     35 Mar  1  2018 rhel6_oel6_centos6
drwxrwxr-x. 4 500 nginx     35 Mar  1  2018 rhel7_oel7_centos7
drwxrwxr-x. 4 500 nginx     35 Mar  1  2018 sles11
drwxrwxr-x. 4 500 nginx     35 Mar  1  2018 sles12
drwxrwxr-x. 3 500 nginx     20 Mar  1  2018 ubuntu
# 解压源码包
[root@dev megaraid_sas]# tar -zxf megaraid_sas-07.705.04.00-src.tar.gz
[root@dev megaraid_sas]# cd megaraid_sas-07.705.04.00/
[root@dev megaraid_sas-07.705.04.00]# ll
total 620
-r-xr-xr-x. 1 root root   1439 Feb 28  2018 compile.sh
-r-xr-xr-x. 1 root root   1819 Feb 28  2018 dkms.conf
-r-xr-xr-x. 1 root root    109 Feb 28  2018 Makefile
-r-xr-xr-x. 1 root root   1021 Feb 28  2018 Makefile.standalone
-r-xr-xr-x. 1 root root 288460 Feb 28  2018 megaraid_sas_base.c
-r-xr-xr-x. 1 root root  40784 Feb 28  2018 megaraid_sas_fp.c
-r-xr-xr-x. 1 root root 150733 Feb 28  2018 megaraid_sas_fusion.c
-r-xr-xr-x. 1 root root  52563 Feb 28  2018 megaraid_sas_fusion.h
-r-xr-xr-x. 1 root root  81914 Feb 28  2018 megaraid_sas.h
# 经查看 compile.sh 发现可以在脚步里面指定 kernel 的版本,那么修改成想要适配的版本:
[root@dev megaraid_sas-07.705.04.00]# vi compile.sh
        kernel="3.10.0-1062.el7.x86_64"
# 编译
[root@dev megaraid_sas-07.705.04.00]# ./compile.sh
[root@dev megaraid_sas-07.705.04.00]# ll *.ko
-rw-r--r--. 1 root root 2705768 Dec 30 17:07 megaraid_sas.ko
4.1.3 生成模块依赖文件并加载⚓
# 先查看一下有没有这个驱动
[root@dev megaraid_sas-07.705.04.00]# modinfo megaraid_sas
filename:       /lib/modules/3.10.0-1062.el7.x86_64/kernel/drivers/scsi/megaraid/megaraid_sas.ko.xz
……
# 已经存在了,那么替换掉试试
# 先卸载
[root@dev megaraid_sas-07.705.04.00]# modprobe -r megaraid_sas
# 备份
[root@dev megaraid_sas-07.705.04.00]# mv /lib/modules/3.10.0-1062.el7.x86_64/kernel/drivers/scsi/megaraid/megaraid_sas.ko.xz /home/
[root@dev megaraid_sas-07.705.04.00]# xz -k megaraid_sas.ko
# 复制
[root@dev megaraid_sas-07.705.04.00]# cp megaraid_sas.ko.xz /lib/modules/3.10.0-1062.el7.x86_64/kernel/drivers/scsi/megaraid/megaraid_sas.ko.xz
# 生成模块依赖文件
[root@dev megaraid_sas-07.705.04.00]# depmod -a
# OK,成功加载
[root@dev megaraid_sas-07.705.04.00]# modprobe megaraid_sas
[root@dev megaraid_sas-07.705.04.00]# lsmod | grep megaraid_sas
megaraid_sas          172871  0
4.2 利用原有的内核源码进行编译⚓
仅重新编译内核模块的情况。下面以 ntfs 举例:
先到目前的内核源码所在目录下达 make menuconfig ,然后将 NTFS 的选项设定成为模块,然后下达 make fs/ntfs/,那么 ntfs 的模块 (ntfs.ko) 就会自动的被编译出来了。然后将该模块复制到
/lib/modules/3.18.140/kernel/fs/ntsf/ 目录下, 再执行 depmod -a,就完成了在现有内核下新增模块的功能了。
Important
在阅读完上文后,你应该知道:当内核更新之后,自己之前所编译的内核模块会失效!
5. 编译打包最新版的 CentOS 7.x 内核⚓
除了安装上述步骤来编译之外,你还可以使用 ELRepo 网站提供的 SRPM 来重新编译打包,或使用该网站提供的 CentOS 7.x 来直接安装。编译时除了解决依赖问题,还必须要有足够的空间!
下面使用 SRPM 来编译打包。
# 从 ELReo 获取 SRPM
[root@dev ~]# wget https://elrepo.org/linux/kernel/el7/SRPMS/kernel-ml-5.4.7-1.el7.elrepo.nosrc.rpm
[root@dev ~]# rpm -ivh kernel-ml-5.4.7-1.el7.elrepo.nosrc.rpm
# 根据版本获取内核源码。这一步可以跳过,编译时会自动下载。从内核网站 https://www.kernel.org/ 进入。
[root@dev ~]# cd rpmbuild/SOURCES/
[root@dev SOURCES]# wget https://mirrors.edge.kernel.org/pub/linux/kernel/v5.x/linux-5.4.7.tar.xz

[root@dev SOURCES]# ls -1
config-5.4.7-x86_64     # 选单文件
cpupower.config
cpupower.service
linux-5.4.7.tar.xz      # 内核源码
然后你可以修改配置文件,就像鸟哥这样:
[root@dev SOURCES]# vi config-5.4.7-x86_64
# CONFIG_VFIO_PCI_VGA is not set
CONFIG_VFIO_PCI_VGA=y
编译打包:
[root@dev SOURCES]# cd ../SPECS/
# 如果刚刚下载过了内核源码,所以这里就不需要再次下载了,把它改掉
[root@dev SPECS]# vi kernel-ml-5.4.spec
# Sources.
# Source0: https://www.kernel.org/pub/linux/kernel/v5.x/linux-%{LKAver}.tar.xz
Source0: linux-%{LKAver}.tar.xz
[root@dev SPECS]# rpmbuild -bb kernel-ml-5.4.spec
一切正常的情况下,最后会输出一系列的 RPM 包,这样就可以直接安装内核并重启使用,而不用像上文那样一步步地操作啦!
6. 内核编译的步骤小结⚓
- 先下载内核源码,可以从 http://www.kernel.org 或者是 distributions 的 SRPM 来着手;
- 以下以 Tarball 来处理,解压源码到 /usr/src/kernels 目录下;
- 先进行旧数据删除的动作:
make mrproper; - 开始挑选内核功能,可以利用
make menuconfig、make oldconfig、make gconfig等等; - 清除过去的中间暂存盘资料:
make clean - 开始内核文件与内核模块的编译:
make bzImage、make modules - 开始内核模块的安装:
make modules_install - 开始内核文件的安装,可以使用的方式有:
make install或者是通过过手动的方式复制内核文件到 /boot/ 当中; - 建立 initramfs 文件;
- 使用 g
rub2-mkconfig修改 /boot/grub2/grub.cfg 文件。